
In this post, I’ll walk you through the steps required to build your own custom component that extends Vuetify with TypeScript. Part 1 of this series gave an overview of VStripeElements, a component I built to apply Vuetify styling to the credit card inputs provided by Stripe Elements. In Part 2, we took a deep dive into the development environment necessary to do this on your own.
Create Accounts
Before we begin coding anything, you’ll need to make sure you have accounts for key services and have installed the necessary software. If you haven’t got them already, please create accounts at the following sites. Start with GitHub. For the other sites, I strongly encourage you to select the “Sign Up with GitHub” option to link your accounts on those sites to your GitHub account. The places you’ll need accounts (all of which are FREE!) are:
- GitHub
GitHub is where the source code for your extension will live. It will be the primary source of truth about what your extension does, and does not do. - NPM
NPM is the primary repository for public NodeJS extensions. - Travis CI
“CI” stands for “continuous integration” and is a service that will handle running your unit tests. Unit tests are absolutely critical to getting people to trust that your package is well-built. As a general rule, if there are no unit tests, many, if not most, experienced developers will not even consider installing your package. - Coveralls
Unit tests are not enough. “Coverage” refers to the percentage of your codebase that has been tested with unit tests. If 100% of your unit tests pass, but that 100% only represents a coverage of 5% of your codebase, that means 95% of it still untested. A good rule of thumb is that you should strive to have at least 80% coverage for any project you want people to actively download and use. Coveralls is a service that will provide 3rd party verification of your unit test coverage.
While technically you could release a package to NPM that neither has unit tests nor tracks coverage, no serious developer would ever consider installing such a package. There is absolutely no indication that it is of good quality. In the world of open source, we need a way to decide whether or not it is worth it to use other people’s code. For lack of any other better metrics, passing unit tests and at least 80% coverage is what passes for “good enough.”
(Of course, there are alternatives to Travis, e.g. CircleCI, and Coveralls, e.g. Codecov, and tools that do even more than that like CodeClimate. Feel free to use any of these. I’m not specifically endorsing Travis and Coveralls–they’re just the ones I know and they’re the ones that will work out-of-the-box with this template.)
Install Necessary Software
Install Yarn. Also, if you haven’t already, you’ll need to install Git. (Note for newbies, Git !== GitHub. Git is version control software. GitHub is a company that hosts repositories. If you prefer an analogy: git is to GitHub as email is to Gmail.)
The “official” package manager for NodeJS is NPM, which is also the name of the repository where Node packages are usually hosted. Yarn is a 3rd party alternative to the command-line npm software. I’ve chosen to use yarn for this tutorial and my template because that’s what the folks at Vuetify use. Of course, you are free to use npm, but it won’t be the supported way to use this template.
Once you’ve installed yarn, you’ll need to use it to install two global packages: Commitizen and Semantic Release. You can do this from the command line with one command:
Do Some Planning
Before we do any coding, it would behoove us to give some thought to what we’re going to build.
There are 2 hard problems in computer science: cache invalidation, naming things, and off-by-1 errors.
Leon Bambrick’s adaptation of Phil Karlton’s famous quote, via Martin Fowler
It’s a pain in the ass to have to go back later an rename files and variables and GitHub repos, so it pays to spend some time up front deciding what you want to call things. For example, the original name of VStripeElements was VStripeCard. That was until I realized that Stripe Elements specifies a handful of components, only one of which is called a “card.” I also realized that while my first priority was implementing just the “card,” I might later want to go back and add some of the other elements. So I had to go back and rename my repo, and a bunch of files, and a bunch of variables. And yes, it was a pain in the ass.
For this tutorial, I’m going to create a new set of Vuetify components to accomplish a relatively simple, but common, task: implementing form fields for collecting and validating United States postal addresses. Specifically, I’m going to focus on a dropdown menu for picking a person’s state of residence, but as I think about it, I’ll probably also eventually want at least a zip code field, and maybe some way to validate an entire address. That means that the package should have a more generic name having to do with addresses, and the individual components can be specific about what they do.
Vue.js provides a style guide with recommendations for how to name things. I’m a big advocate for following naming conventions, but I’ll spare you a treatise on the reasons behind my philosophy (for now…). I’ve decided to name my package VAddressFields, from which the first component will be VStateSelect. The “V” is for “Vuetify” and I picked it to create an explicit association with other Vuetify components, whose names all start with V. Since this set of components will focus specifically on United States addresses, I wrestled with whether or not to add “US” to the name, e.g. VUSAddressFields or VAddressFieldsUS, and respectively VUSStateSelect or VStateSelectUS. Ultimately those options felt clunky, and I decided that I’ll leave room for my package to expand to cover addresses for other countries in the future. (Yeah, that was it. I’m definitely NOT being lazy.)
Create the Repo
Now that we have a name, it’s time to start on the package. I’m going to go over to GitHub and create a new empty repository like so:
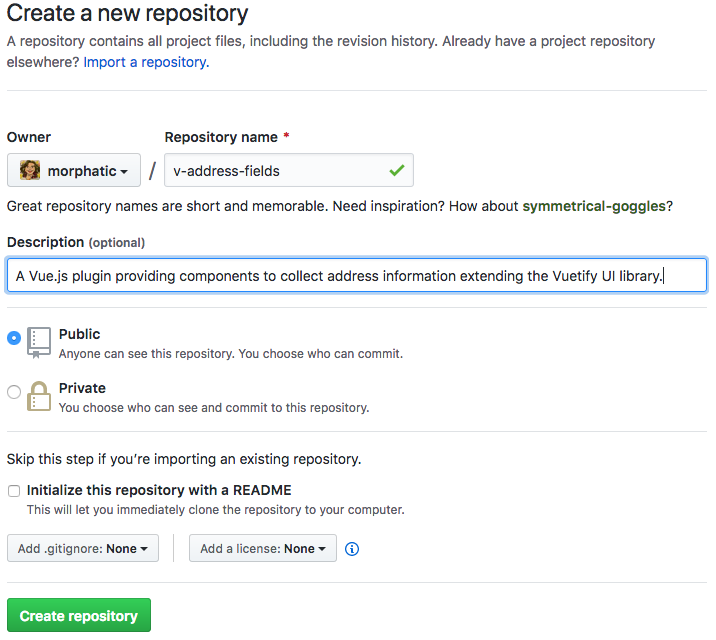
Some things to note:
- It has a short, clear description that contains key words that will help others find it
- It is Public
- Do not check the box to create a README file (one is included in the template)
- Likewise, do not add a .gitignore file nor license as those are also provided.
Once you click “Create Repository,” the next screen you see should look like this one:
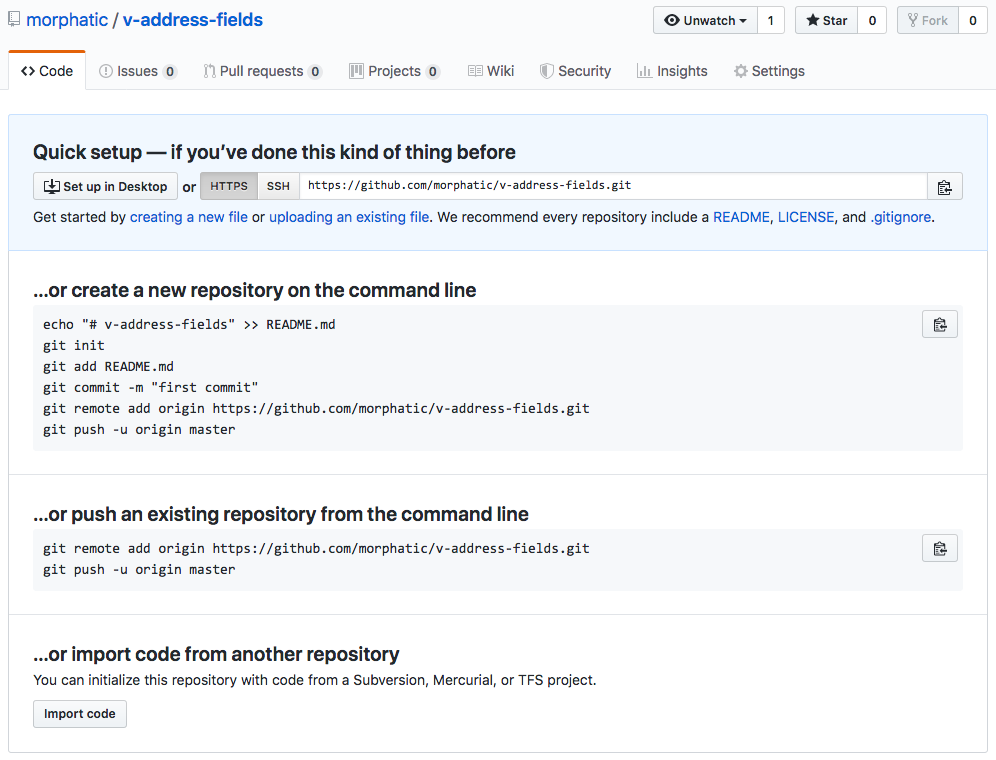
Leave this browser tab open because we will want to come back to it at the very end of this tutorial. Now that our repo has been created, we can go on to the next step.
Download a Zipped Template Copy
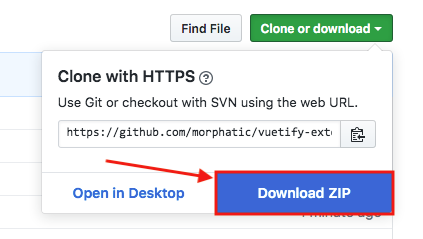
Go to the GitHub repo for the Vuetify extension template. Click the green “Clone or Download” button and select “Download ZIP.” You might be asking, “Why don’t we just fork the repo in our own account?” For sure, that is a legit way to accomplish the task, but I think the way I’ve describe gives you a little more control, and avoids your having to rename your repo (which as I said before, is a pain in the ass).
Unzip in a Local Directory
Unzip the downloaded template and rename the folder with the name you picked earlier. In my case, I renamed the folder to “v-address-fields”. While the folder doesn’t have to have the same name as your repo, it’s a good idea so you don’t forget what you called it.
Rename Stuff

Remember what I said about renaming stuff? Yeah, then you’ll know how I feel about this step. Open the project folder in your code editor (I use VSCode). There are 9 files that we will need to customize BEFORE we install or do anything else. The files (pictured at right) are:
package.jsonLICENSEREADME.mdsrc/index.tsYourComponent.tsYourComponent.sass__tests__/YourComponent.spec.ts
dev/index.jsApp.vue
Efficiency Tip: If you’re using an editor (like VSCode) that has global find/replace, you can use that to edit all of the files at once, since many of the changes are similar from file-to-file.
Specifically, here are the things you need to change:
package.json
The name field should match the name of your repo (in my case v-address-fields). I’ve set it up so that you can do a “find and replace” for the text REPLACE_WITH_YOUR_COMPONENT_NAME. All of the instances of this text should be replaced with the exact same thing.
Update the description. I made mine match the description I wrote when creating the repo itself. Update the author field with your own information. You do not have to include a website, but it’s a really good idea to include an email address where people can contact you if they have questions about your code. Use the same email address you used to create your NPM account.
Find and replace the text YOUR_GITHUB_USERNAME so that the package will be associated with your GitHub repo.
The license field is set to “MIT” by default. I’ve also included a LICENSE file that is is pre-populated with the MIT license and only requires you to insert your name. You are free to change the license to whatever you would like, but I strongly encourage you to adopt one of the open source licenses.
You may now save and close package.json.
LICENSE
Open the file named LICENSE. If you choose to use the MIT license, then all you need to do is update the year to the current year, and replace the text YOUR NAME with your actual name. Then you can save and close this file.
README.md
Eventually, this file will contain full, detailed instructions to people on how they can make use of your custom components. For now, you should delete everything that’s in there, and just add the Pascal-cased name of your package, and a short description of what it is/does in Markdown format. (If you don’t know Markdown, you should learn it. It will only take a few minutes.) Here’s mine:
I kept the “Questions” section at the end and modified the link to point to my new repo.
Actually, it’s not a bad idea to start your project by writing the documentation. Starting the project by explaining to the end user how they should use it will force you to think carefully through all phases of development. Not only that, but it’s a lot easier to finish the docs before you do any coding. If you wait until afterwards, there’s a chance you’ll have run out of steam and be tempted to blow it off. If you want your package to become popular and widely-used, good documentation is critical, so whatever you can do to make yourself put significant energy into this is a good idea.
src/index.ts
In src/index.ts replace all instances of YourComponent with the name of your first component, i.e. in my case VStateSelect. Replace YourPackageName with the package name, i.e. VAddressFields. Don’t forget to use the kebab case of your component on line 6 where you’re registering the component with Vue.
(BTW, earlier I referred to “Pascal case” and just now to “kebab-case.” If you don’t know the various variable naming conventions/case types, you should take a few minutes to learn them.)
Here’s what my file looked like when I was done:
src/YourComponent.ts
Rename the YourComponent.ts file to the name of the component you’re going to create, e.g. VStateSelect.ts. Inside the file, find and replace all instances of YourComponent with, e.g., VStateSelect, and all instances of your-component with v-state-select. Don’t worry about the other stuff in that file right now. We’ll get to editing this file in the next installment of this tutorial.
src/YourComponent.sass
All you have to do is rename this file like you did with YourComponent.ts. There’s no content in the file to be edited right now.
src/__tests__/YourComponent.spec.ts
Rename this file to match your component name, e.g. VStateSelect.spec.ts. Inside the file, replace YourPackageName with, e.g. VAddressFields, and YourComponent with, e.g. VStateSelect.
dev/index.js
Almost done. In this file, replace YourPackageName with, e.g. VAddressFields.
dev/App.vue
Actually, you might not want/need/be able to do anything in this file right now. This is eventually where you’ll put a “demo” version of your new component that you’ll use during development to monitor progress. For the purposes of this tutorial, I’m not going to make any changes to this file right now.
Yay!!! Done. Wasn’t that kind of a PITA?
Install Default Dependencies
Okay, now from the command line, run yarn to install all of the dependencies (i.e. on the command line, type the word yarn and hit [Enter]). This will install local copies of all of the dependencies listed in package.json. It will take a few minutes depending on the speed of your internet connection. There are quite a lot of packages to be installed, but none of these will end up being deployed with your package, so there’s no need to worry that they’ll add weight to the package.
When it’s all done, there will be a node_modules folder added to your project, and also a file called yarn.lock. The folder is where all of the dependencies get downloaded to and will not get uploaded to your repo. The second file keeps track of every single package that was downloaded into node_modules and should become a part of your repo.
Initialize Local Git Repo
Go back to the command line and type: git init and hit [Enter]. You now have initialized an empty git repository on your local machine. To add the files of the project to it, type: git add . and hit [Enter]. (Yes, there is a dot in that command. The dot means “all of the files in this directory.”) But we’re not going to commit these changes just yet. First we need to make our repo “commitizen friendly.”
Make Repo “Commitizen Friendly”
Type the following command on the command line:
This will (re)install the dependencies required by commitizen and setup our repo to override normal git commit commands and force us to follow best practices and always include informational commit messages.
Make Your First Commit
I know. Commitment is scary. Overcome your fear and enter git cz on the command line. This will start up an interactive session with commitizen to gather info about what changes have been made to your repo. The first question will ask you what type of change you’re making. Here is a list of descriptions of all the different types of changes. In this case, it really could be any or all of these different types. Since choosing feat is one of the choices that will trigger Semantic Release to create and publish a new build to NPM, and I don’t think we’re quite ready for that yet, I’m going to recommend that you choose chore. Use the down arrow on your keyboard to scroll through the choices until chore is highlighted and hit enter.
For the second question (scope), this really applies to the entire project, so just hit enter to skip this one.
For the short commit message, type the traditional “first commit” and hit enter. You can type the same thing for the “longer” description as well. There’s really not too much to say here that’s informative. Breaking changes? No. Open issues? Again, no. After that, your first commit will have been applied and we’re ready to move on.
Run Your First Tests
From the command line run yarn test. This will fire up Jest and run your unit tests for the first time. Assuming you’ve followed all of the instructions heretofore perfectly, you should have four passing tests. We’ll discuss the tests in more detail in our next installment. For now, let’s move on.
Do Your First Build
Now from the command line run yarn build. Again, assuming you’ve done everything so far perfectly, you should now have three additional directories in your project (dist, es5, and lib). These contain built and exported versions of the component you are building. While these don’t really have any additional functionality in them right now, the fact that this process completed successfully gives us a baseline to know that our build process works as it should.
Start the Dev Server
Now type yarn dev from the command line. This will spin up the dev server. If all has gone smoothly, there should be no errors or warnings in the console and you should be able to see your “demo” site by opening your web browser and navigating to http://localhost:8080/. Here is what you should see there:
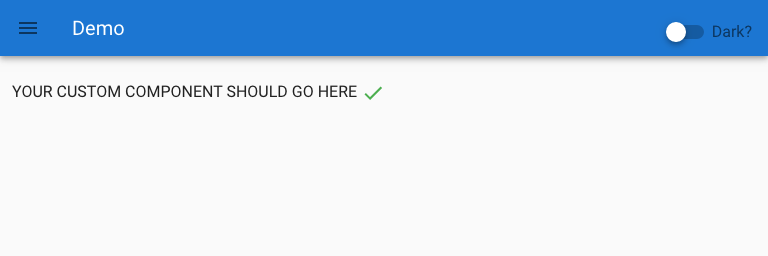
This is the Vue + Vuetify app that resides in the dev/ folder in your project. Open up the dev/App.vue file and make a change to the text that says “YOUR CUSTOM COMPONENT SHOULD GO HERE”. Save the changes and then check your browser. The dev server should have automatically rebuilt the project based on the changes you just made and reloaded the changed app in the browser. There’s a toggle button in the upper right to toggle Vuetify’s dark theme. This comes in handy when testing because you can make sure your new component will look fantastic in either of the default themes.
To stop the dev server, go back to the terminal and hit [ctrl] + [c] (hold down the “control” button and then hit the “c” key).
Commit Our Changes
If you want to see a list of which files have changed, type git status from the command line. Since our last commit, we’ve:
- built the project,
- run tests (which generated a snapshot–more on this in the next tutorial), and
- made some small changes to
dev/App.vue.
Thinking ahead, if we were to commit all of these changes at once, how would we choose which category/type of commit to select when commitizen asks us? One of the great things about commitizen is that it forces you to think in terms of very small, incremental changes. With what we’ve done, the output of running yarn build should probably be committed as a build type. The snapshot generated by running the tests should be committed as test, and the change to App.vue would be a refactor.
But we only get to choose ONE commit type per commit. So in this case what we want to do is add these changed files in batches. Let’s start with the refactor. Type git add dev/App.vue and hit enter from the command line, then run git status again. Now you’ll see that dev/App.vue has been added to the list of files to be committed. All of the other files are still listed as either “not staged for commit” or “untracked.”
Let’s commit the refactor. Type git cz and hit enter. Choose “refactor” as the commit type. Skip the second question, enter “confirm dev server refresh” for the short and long commit messages, and hit enter twice to accept the default choices for the last two questions. Now run git status again. You’ll see that dev/App.vue is no longer on the list. That’s because we just committed those changes to the repo.
Now let’s add the testing snapshot that was created by Jest (when we ran yarn test). Type git add src/__tests__/__snapshots__/* and then run git cz. Choose “test” as the commit type and use “add first snapshot” as the commit messages. Accept the defaults for the last two questions. Now check git status again. All that is left are the files that were created as part of the first build.
Type git add . to add ALL of the remaining files to our next commit. Then run git cz and choose “build” as the commit type. Type “first build” for the commit messages and accept the defaults for all of the other questions. Now when you run git status you get the lovely message “nothing to commit, working tree clean.”
Congratulations, you just observed one of the “best practices” when it comes to managing revisions in a project. By dividing up a number of changes into clear and distinct categories, and attaching a meaningful message to all of them, you’ve taken a great step toward building a super-well organized, high-quality, maintainable package.
Push to the Remote Repo
At this point, we still have not connected our local repo to our remote repo. Remember that screen we saw on GitHub, way back at the beginning of this tutorial, right after we created our repo there? Go back to that tab in your browser. About halfway down the page, there’s a line that begins git remote add origin... Copy that line and paste it into your command line, and hit enter. It may look like it didn’t do anything but if you type the command git remote -v, you’ll see that your GitHub repo has been added as a “remote origin” for your local repo.
Now enter the command git push -u origin master. You may be prompted for your username and password for your GitHub account. This is to ensure you have appropriate permissions to write changes to the remote repo. In the future, your credentials should be remembered on your computer (learn about git credential storage so you don’t have to type them every time!).
Once you have authenticated successfully, your changes will be pushed from your local repo to your remote repo. If you refresh the browser tab that is open to GitHub, you should now see something like this:
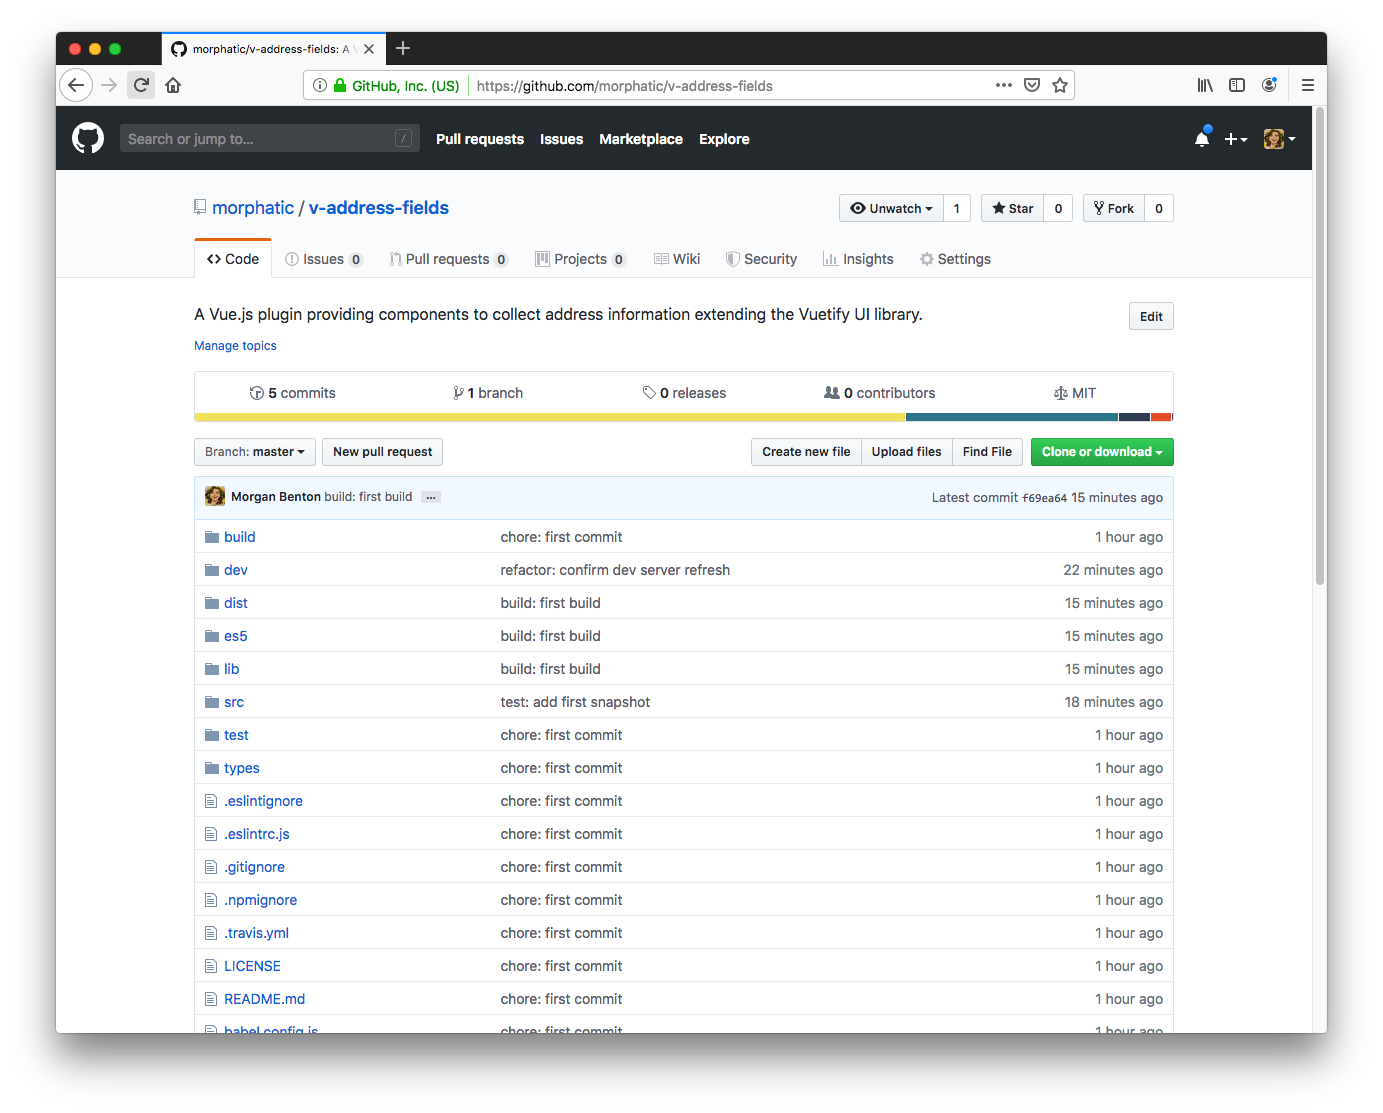
Yay! Now all of our changes so far are safe and sound in our remote repository. We’ve only got a couple of steps left to finish the setup.
Setup TravisCI
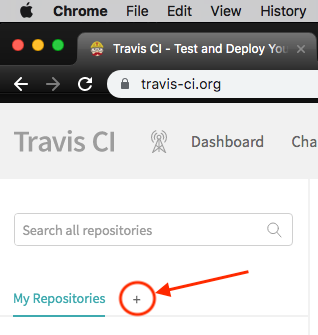
Log into your TravisCI account. On the main screen near the top left you should see a tab that says “My Repositories” that has a small plus sign to the right of it. Click the plus sign. On the page that comes up you should see a list of your available GitHub repositories (assuming you’ve already given Travis permission to access your GitHub account). However, since we’ve only just added our new repo, it might not be in the list yet. Click the button in the upper left that says “Sync Account.” It will take a little while for Travis to send a message to GitHub and retrieve the latest list of repositories in your account there. Once it’s done, search for the name of your new custom Vuetify component in the search bar to the right. Click the toggle button indicated in the screenshot below:

This will instruct Travis CI to keep an eye on this repo. Whenever you push changes to GitHub, Travis will immediately pull down the latest version of your code, spin up a testing server, install your package and run the unit tests. If the tests complete successfully, it will then collect coverage information and attempt to send it to Coveralls, which is what we’ll set up next.
Tracking Coverage with Coveralls
By this time, hopefully you’ve setup an account at Coveralls.io and linked it to your GitHub account in the same way you did for Travis. As we did with travis, we need to instruct Coveralls to watch our repo.
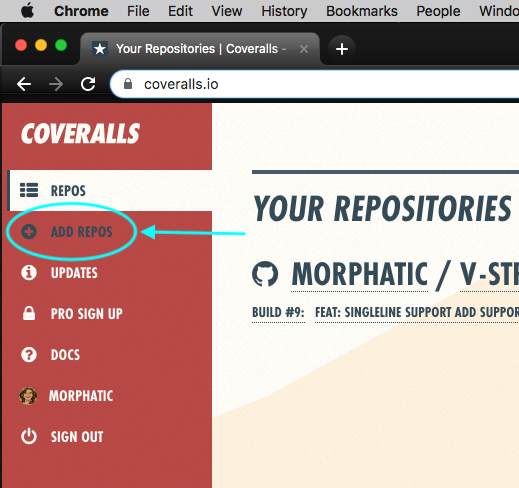
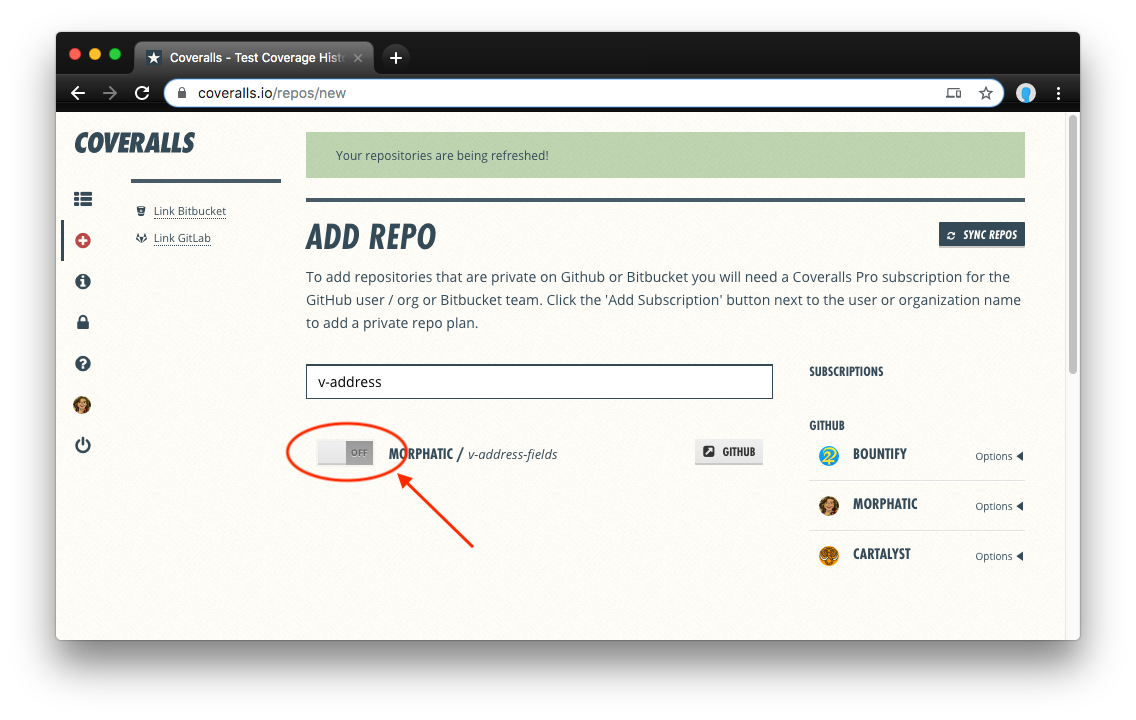
In the upper-lefthand side of the screen, if you mouse over the little plus sign inside of a circle, a menu will pop open with the choice for you to “Add Repos.” Again, you will likely need to tell Coveralls to “sync repos” with your GitHub account. The button to do this is in the upper right of the screen (it’s dark blue). Once this is finished you will be able to see your new repo in the list of repos that comes up. There will be a toggle button (pictured below) that you need to press in order to turn on coverage tracking with Coveralls. The next time you push changes to GitHub, and Travis successfully runs all of your tests, the coverage info for that test run will be sent automatically to Coveralls. You can go there and click through the results to see exactly what lines of code have (and have not!) been tested (yet). This is extremely useful information for figuring out what you need to pay attention to in your coding.
Setup Semantic Release
The final step in this part of the tutorial will be to setup Semantic Release. Earlier you installed semantic release globally on your local machine. Now from the command line, in the root folder of your project type the command:
You will be asked a number of questions. When asked what your npm registry is, accept the default. Select “Token based” authentication. Provide your npm username/password as well as your GitHub username/password, and select Travis CI as your CI. Once this is done, you may notice that your package.json file has been updated slightly. The Semantic Release package will have been updated in the list of dev dependencies, and the version field will have been changed to 0.0.0-development. This is the version number that will exist until we make our first official release.
Behind the scenes, Semantic Release will use your GitHub credentials to request a token that will be stored in your Travis CI account associated with your repo. Semantic Release is a pretty amazing tool and you should take the time necessary to read their user manual.
The last thing you should do is git add package.json to stage the changes to be committed. Then run git cz and select “chore” as the commit type and “configure semantic release” as the commit messages. Don’t forget to git push your changes to the remote repo after you commit. This final push should trigger Travis to run your tests and also send coverage info to Coveralls.
Congratulations!!!
You are now completely setup and ready to begin developing your custom component to extend Vuetify. I don’t know about you, but it feels like we’ve already done a TON of work and we haven’t even really written any code yet. You may recall that I commented earlier that managing a high-quality package is extraordinarily involved and complex.
At this point it would be a good idea to go back and read up on the background and user manuals of any of the pieces of this setup process that you still feel shaky on. Don’t worry, the longer you do this, the more comfortable and natural it will begin to feel. Hang in there!
In the next installment of this tutorial, we will build out our VStateSelect component, make sure it is thoroughly tested, add meaningful documentation, and make the changes that will trigger Semantic Release to publish the first version of our component to NPM!
Webmentions
[…] it would behoove you to go back and read the earlier installments of this series: Part 1, Part 2, Part 3, and Part 4. In this installment, we’re going to pick up where we left off. More […]
[…] Part 3 walked you through the steps to setup your own dev environment building off of my Vuetify extension template. […]
[…] hope to make this easier for more people to do. In the next installment of this series, I’m going to introduce my Vuetify extension template and walk you through the steps of […]