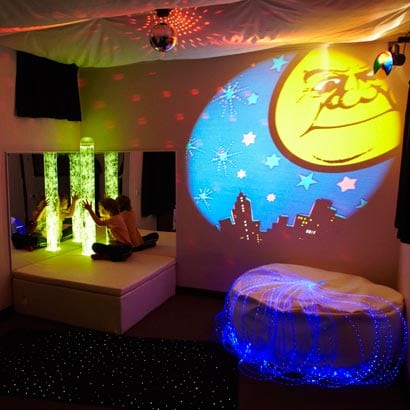
Example of a Sensory Room
Imagine the most annoying alarm you’ve ever heard clanging in your head all the time. Last week I had the good fortune to attend the 2016 Autism Conference hosted by the Matthew Reardon Center in Savannah, Georgia. It was there that I learned that many people with autism spectrum characteristics (ASC) experience continuous sensory overload. The “most annoying alarm” description was given by one of the neurodiverse participants at the conference (“neurodiverse” is another name for people with ASC). One of the cool ways that people have found to cope with this overstimulation is to spend time in “sensory rooms” like the one pictured here. Spending time in a sensory room is calming and rejuvenating, and allows those with ASC to recharge their batteries so that they are better able to interact with people and circumstances in the default world.
As it turns out, after having spent some time in a sensory room set up at the conference, I think everyone could benefit from having one of these. So after I got home from the conference, I started looking into acquiring some of the cool objects one typically finds there. Unfortunately, as I found out, building your own sensory room is very expensive!
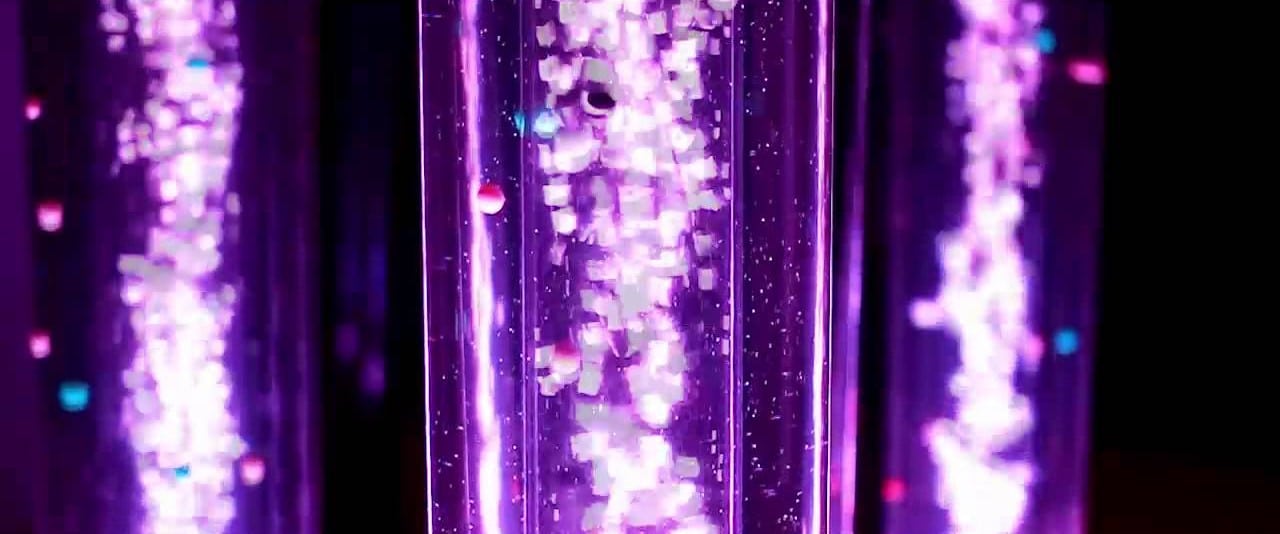
For example, one item frequently seen in sensory rooms is a “bubble tube.” This is basically just a plastic tube filled with water, with colored light and air bubbles being pumped up through it. They are mesmerizing to watch, and really quite beautiful. Unfortunately, a “budget” bubble tube can cost nearly $600 while a more fancy “interactive” one costs nearly $3,500! By “interactive” they mean that you can push a button to change the color of the lights. Seriously?
Naturally, I figured I could build one of these things myself for much less money. This is the first in a series of blog posts recounting my journey building a bubble tube.
Design Specs
So, I didn’t really have an exact design in mind as I got started, but as I’ve weighed various options, here are the features my bubble tube will have:
- It will be about six feet tall, and the tube will be four inches in diameter
- It will be lighted by programmable LEDs that can be any color, and have any kind of light pattern one could think of
- It will be controllable wirelessly from a smartphone or tablet app
So far, my design puts my bubble tube on par with some of the most expensive models I found online, but as of right now my budget is coming in well under $200.
Shopping List
Here are the parts I’ve ordered so far, where I got them, and how much they cost. I’m not sure if these will end up being the right parts, but I will update you in future posts if I change my mind about any of them.
- Acrylic Extruded Tubing: 4″ diameter 6′ length, $9.07/ft
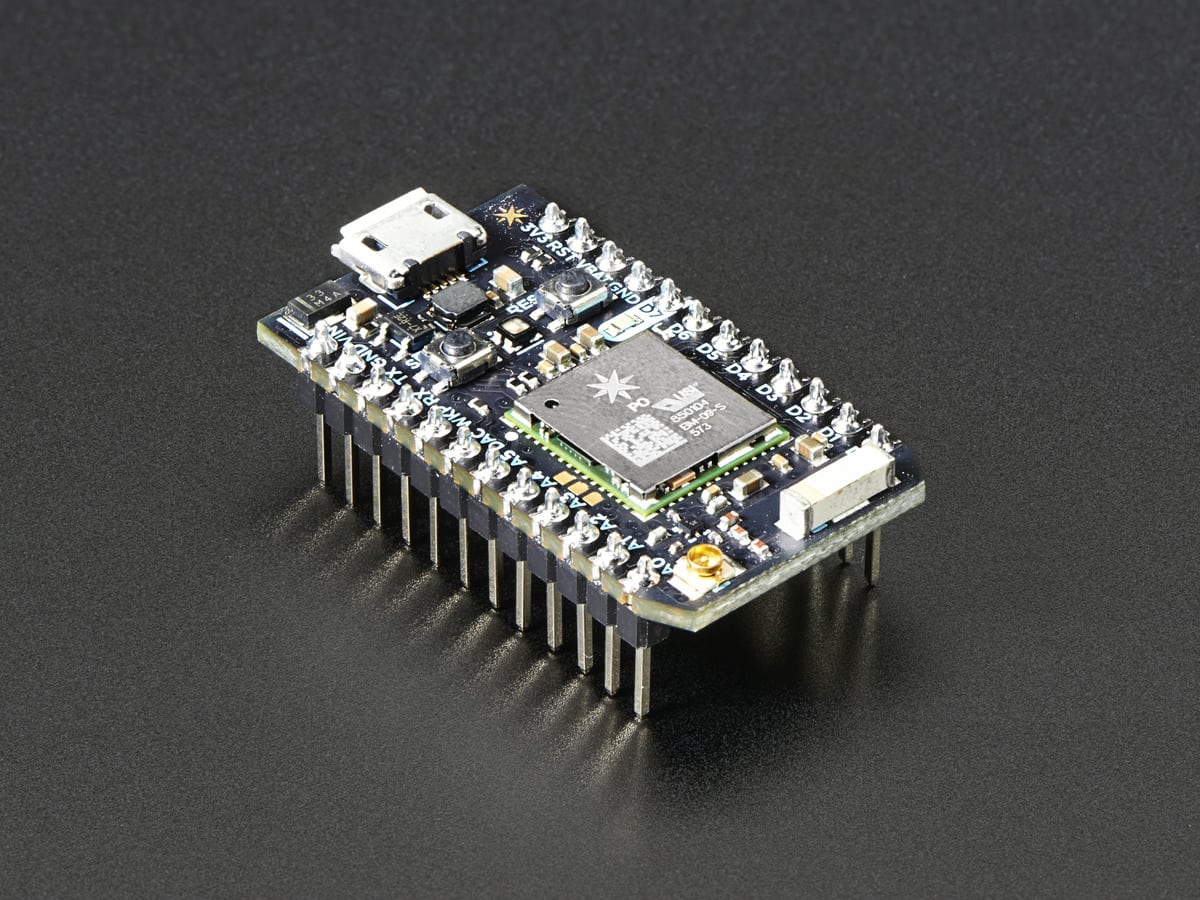
The tubing actually turns out to be one of the most expensive parts. I looked at a bunch of sizes between 2″ and 6″ and found that this stuff can cost over $30 per foot! I found the best price at US Plastic. Turns out shipping is kinda expensive so the total cost for this was a little over $70. - WiFi Enabled Microcontroller: Particle Photon, $19
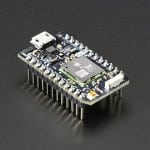
Particle Photon
I actually didn’t start out with a plan to make this project wireless, but when I found this microcontroller for so cheap, I couldn’t resist. BTW, Particle is a company that makes components for creating Internet-of-Things (IoT) stuff. They have great documentation and open-source tools to support their hardware. I bought my Photon at one of my favorite online stores for DIY electronics, AdaFruit.
- Programmable LEDs: AdaFruit Particle NeoPixel Ring Kit, $24.95

NeoPixel Ring
Another reason I got the Photon was how well it was designed to pair with the ring of LEDs that I found on AdaFruit. When I saw the picture, read the description, and watched their video, I was sold. I’ve used NeoPixels from AdaFruit for a number of projects, and I really like them. However, if you want to find them elsewhere, you want to search google for “ws2812” which is the standard name for 3-color, programmable LEDs. I’ve looked into ordering them directly from China for much cheaper, but so far I haven’t actually done that yet.
- Electric Air Pump that can run on 5V of power, $4.20
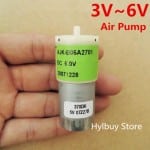
5V Air Pump
I found this on eBay, so I don’t know how long you can expect the same product to be there, but you should be able to find one that’s similar. Since the NeoPixels and the Photon both run on 5V power, I was looking for a small (hopefully quiet) and inexpensive pump for pumping bubbles into the tube. I’m hoping this one works out, but right now I’m just crossing my fingers. I found a couple of videos that showed a very similar model doing exactly what I need. The only downside of this one is that it ships from Hong Kong, so I have to wait a couple of weeks for it to get here.
- Check Valve: $0.42
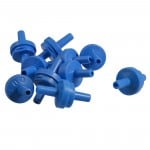
Check Valves
Since the bubbles come from the bottom of the tube, I needed a way to make sure that the water in the tube doesn’t flow back into the air pump (and out into my room!). I didn’t know this when I started, but I discovered that the item I needed for this is called a “check valve” which will allow air to come in, but no water to get out. I found these really cheap ones, for about $0.40 each. I had to buy them in a batch of 10, so I have extras. Anyone want one? First come, first served! I tested one out in an old plastic orange juice bottle, and so far it has been perfect. I don’t know how they’ll hold up when I’ve got over 3 gallons of water on top of one.
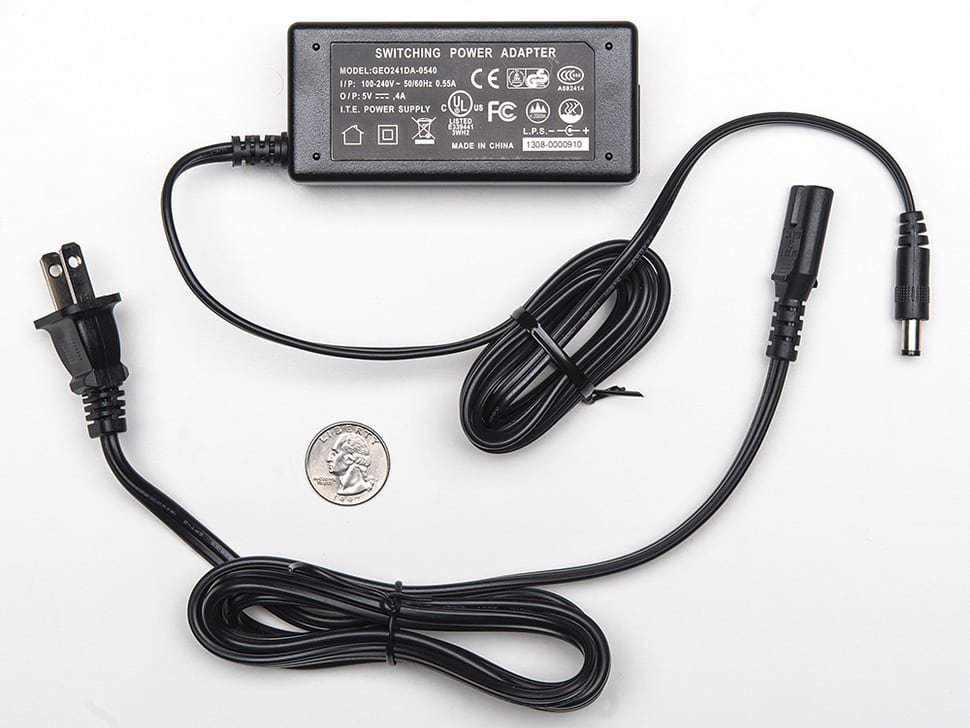
- Power Supply, $14.95
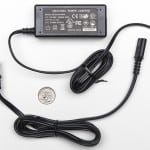
5V 4A Switching Power Supply
This is just a standard converter like you might use with a laptop or other electronic appliance. It will take 110V wall current and convert it to the 5V that we need for our project. I got this one at AdaFruit, but you can probably find them cheaper elsewhere. However, I like the folks at AdaFruit, and I also was trying to keep to a reasonable level the number of different stores from which I was buying stuff. Just keep in mind it is very important that you get the right size power supply!!! Too big and you can fry your electronics. Too small and you get dim light and not so many bubbles.
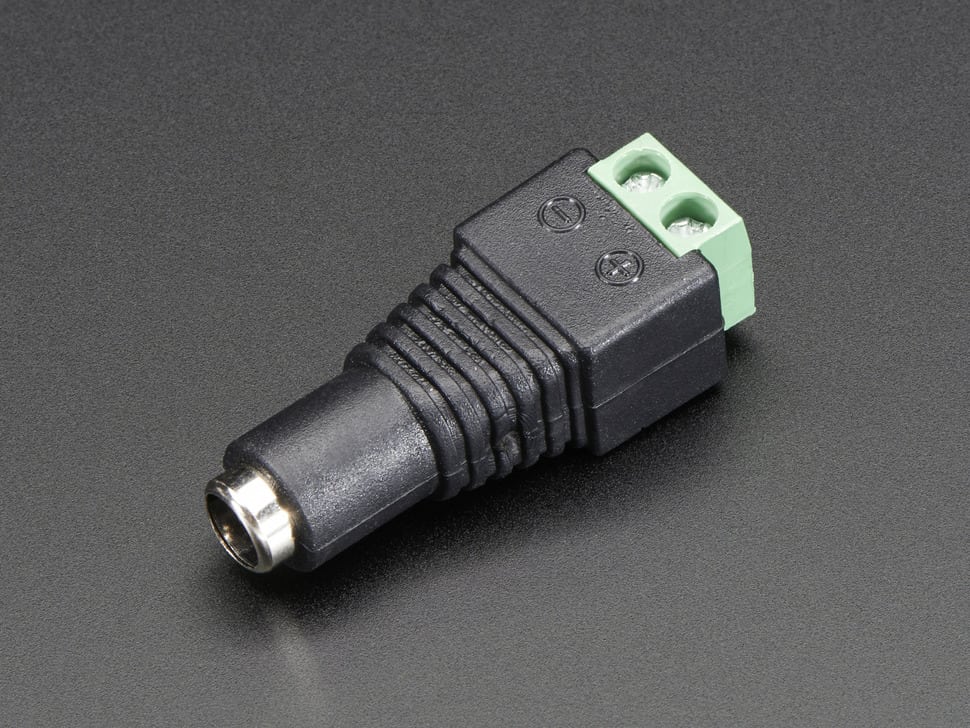
- Power Supply Adapter, $2
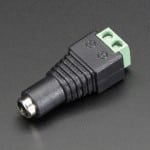
2.1mm DC Jack to Screw Terminal Block Adapter
This last piece is what the power supply plugs in to. On the other end it has handy little receptacles for connecting the wires from your LEDs, microcontroller, and pump. In retrospect, I probably should have ordered a couple more of these guys because they come in handy when doing other projects. I’m pretty sure I’ll be ordering more of these in the very near future.


This is all of the stuff I’ve bought so far. If you’ve been adding it all up, it comes to about $140. However, here are some other things I expect to pick up over the next couple of weeks. All of these things are cheap and easy to find locally.
- Pump Tubing: You can get this at any pet store where they sell aquariums
- Anti Algae Drops: To prevent green funkiness; again pet store
- Silicone Adhesive: Actually, I already had this, but you’ll need it
- Spray Paint: for painting the base of my bubble tube to make it pretty
- Plexiglass: I need a small piece to make the bottom of the tube
Next Steps
My stuff has just started to arrive. I’ve begun playing with some of the pieces, but haven’t really learned enough yet to write about. I plan on making the base of the bubble tube with a 3D printer. I’ve never done 3D printing myself, so I’m sure that is going to be an adventure. I don’t know how much it costs to 3D print stuff, so this part of the project could blow my budget, but I don’t think that it will. Stay tuned, though. I’ll have another installment soon!
I am looking to make bubble tubes as centerpieces for a large party and then donate them to a OT hospital department or schools in the neighborhood. Is there any way of making these battery operated so that they can be centerpieces?
I don’t see why not. I don’t have a sense for how much power they draw but you can get some pretty large batteries for not too much money. I would expect you could get several hours of lights and bubbles from 20k mAh.
I bought this (https://www.amazon.ca/gp/product/B01HM7DDDY/ref=oh_aui_detailpage_o02_s00?ie=UTF8&psc=1) and am having success; it is very bright and illuminates the whole tube. I suggest two sets of batteries so you can just swap out. Also a remote control unit will need to be able to transmit to the receiver on the lights. Keep this is mind when designing your base.
Morgan,
I’m looking to do this for my daughter. Have you made it to a finished product?
@Chrus, see my reply to @Delia above.
How did the finished product turn out?
Kinda embarrassed to say that I haven’t quite finished it yet. I got sidetracked by other projects. Part 6 of this series can give you an idea of what it will look like, though.
Thank you for this. I have a 12 yr old autistic son. We are in the process of building our home and I really want to include a sensory room. As most with a disabled child know, money is a big problem. I am so excited about your project. I can’t wait to tell my husband he has a new project. I wanted to thank you for all your time and research on this and your specifics are appreciated. Can’t wait to see more!
Glad it helped! Yes, these things aren’t cheap if you buy them retail…
Hello!
I wanted to thank you for this tutorial! I recently completed my project and am happy with the results. I made a few alterations and a note; the check valves you linked are cheap and leak under pressure. Alteration wise, I bought a remote control unit and attached it to the outside of the platform; so my son can have full control.
Again, thank you, it made finding a starting point on the whole thing much easier.
Yes! I’ve discovered that the check valves leak. 🙁 My entire tube leaked slowly out into my kitchen over the span of several weeks. Thanks for pointing this out. Do you have any recommendations for alternative check valves that will be a little bit more durable?
could you provide a link to the check valves and to the remote unit that you purchased?