
So as you can imagine, a tube full of water that is four inches wide and six feet tall is not very stable. I needed a way to:
- Provide more stability to the bubble tube when it is standing upright
- House the NeoPixels and the air pump and all their tubing and wiring
- Make it easy to plug electricity into those components
- Protect the electrical/electronic components from getting wet, should the tube leak
- Dampen the noise and vibration from the air pump
This is the 3rd installment in my series on building a DIY Bubble Tube. If you missed the first two installments, here is Part 1, and here is Part 2.
How big should the base be?
To be totally honest, I really don’t know. I searched for articles or design manuals that might suggest how wide or heavy the base needs to be to make the tube stable. I also searched for articles that might suggest how many inches of the tube need to be stuck down in the base in order to keep it stable. I didn’t find anything.
Ultimately, I decided to make the base the biggest size I could print on the 3D printers at the X-Labs, where I’ll ultimately be printing out the base. This turned out to be a maximum base diameter of 11 inches and a height of about 9 inches. If anyone has any more insight into designing the bases for tall, slender, relatively heavy objects like this, please let me know!
What was my design process?
Mostly, I just spent a lot of time doodling different ways to build the base on paper. Originally I’d thought to have two pieces, one that holds all of the electronic components, and then a cover that sits down over top of all of that and holds the tube itself. Ultimately, I decided it would be easier to make it one big piece with compartments for the other components with snap-on covers. (In case you can’t picture this in your head, it’ll make more sense later when I show you the actual diagrams.)

Using Electronic Calipers to Measure Component Sizes

Doodling Design Ideas
Of course, I’ve never done any 3D printing, so I went to the aforementioned X-Labs to take a free class from Joey who works at Hatch3d, a local business that provides all kinds of 3D printing services. He showed us the basics of a piece of software called Fusion 360 by Autodesk. The software is free for anyone who’s a student, educator, or hobbyist who makes less than $100k a year using it…so basically everybody.
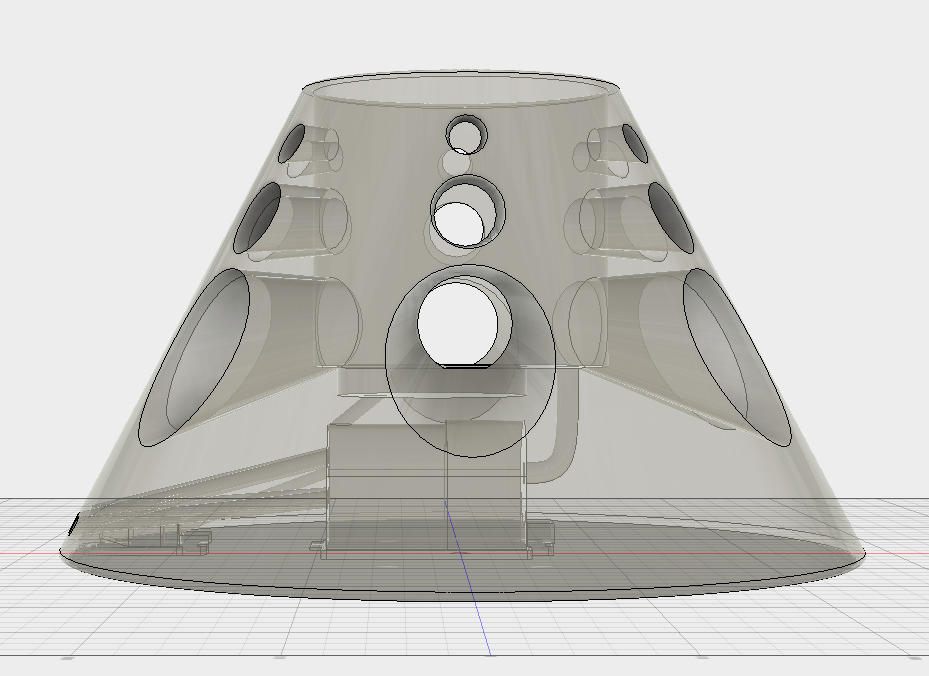
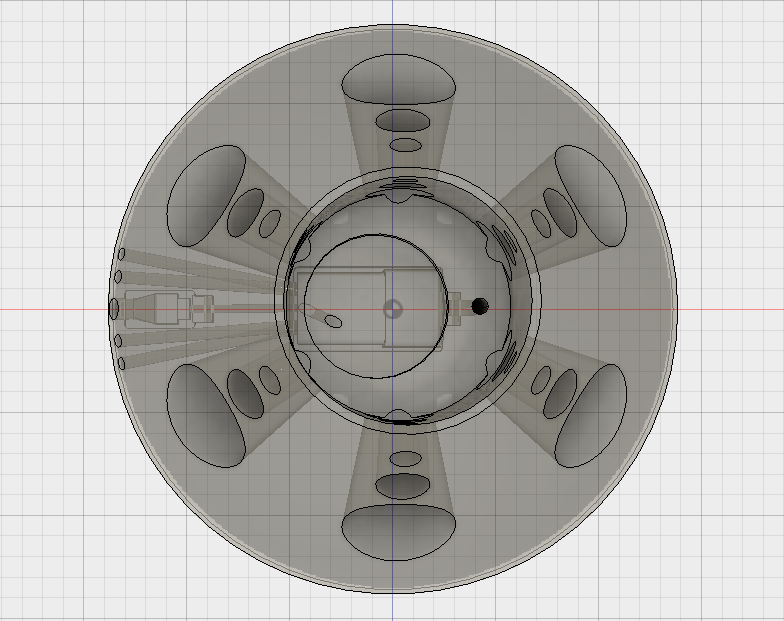
Other than that, I spent nearly 20 hours watching videos, reading manuals, and just playing around with Fusion 360 until I was able to get it to do what I want. Here are some screen shots of what I’ve got so far. I haven’t had a chance to actually 3D print these yet, but I want to share them before the reality of printing shatters the Platonic ideal of the precise images on my computer screen.


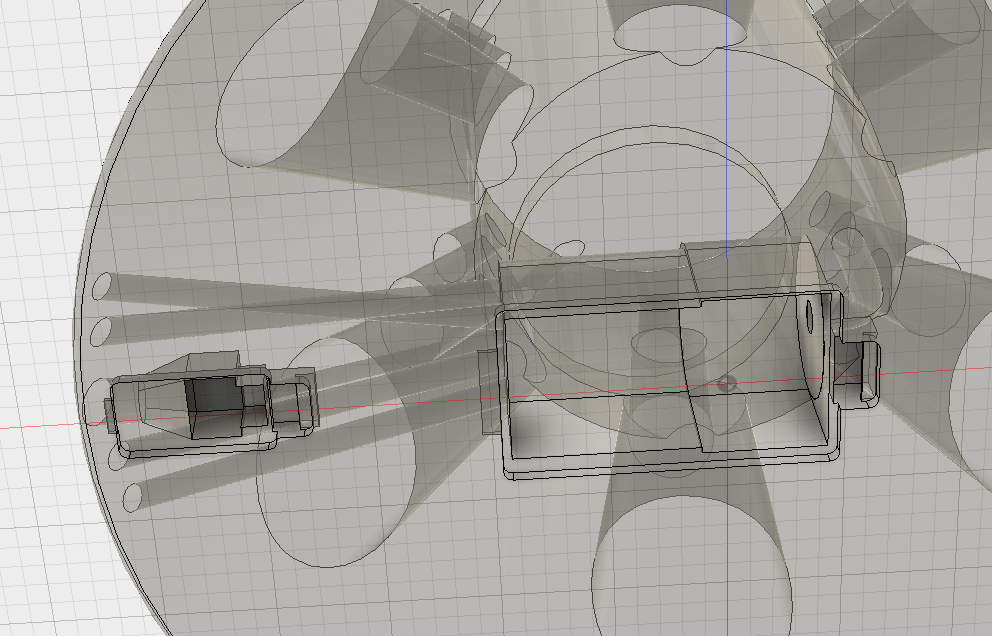
The hardest part of this design (other than learning how to use the software) was figuring out how to design the pump and power adapter compartments and their covers. For this I got inspiration from two places. First was this design guide for snap-fit joints for plastics written by Bayer Material Science division and posted on some MIT course website. It shows a number of different designs for getting plastic pieces to snap together. After looking at that, it made me realize that the second source of inspiration was just in the other room: my TV remote control, more specifically the battery compartment cover:

Remote Control With Open Batter Cover

Close-up on Battery Cover
After examining these, I was able to build some sort of close approximation in Fusion 360:

Air Pump Compartment Cover
Conclusion
Of course, I still have no idea whether or not any of these things are going to print out correctly, but I’ve had an amazing time getting this far. Stay tuned for a couple more installments on this series. I’ve been having a rough time finding an adhesive strong enough to hold my end cap on the bottom of my tube. Have dumped water all over myself a couple of times. But at least it’s warm outside now! Peace.
would you be willing to sell one of these bases ?