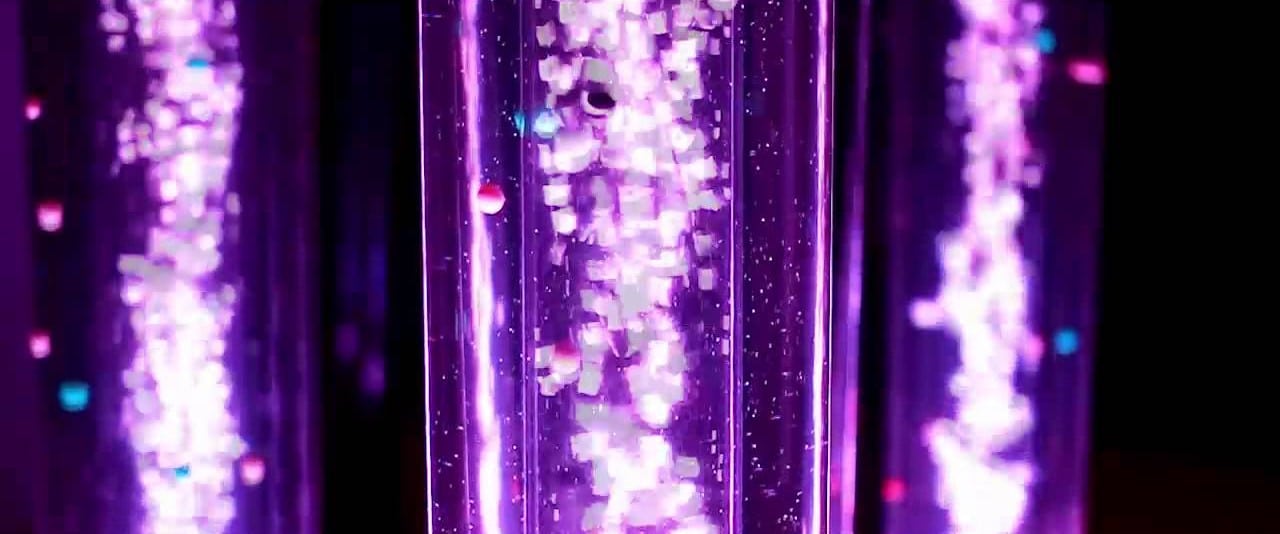
In this post, I’m going to describe the coding involved in creating my DIY bubble tube. In case you missed it, Part 1 of this tutorial describes this project in more detail and gives a provisional shopping list of parts you’d need to buy to do it yourself. I may amend the shopping list later, but so far, things are looking good!
Putting the Pieces Together
Before diving into the programming, I had to solder my Particle Photon onto my NeoPixel ring.
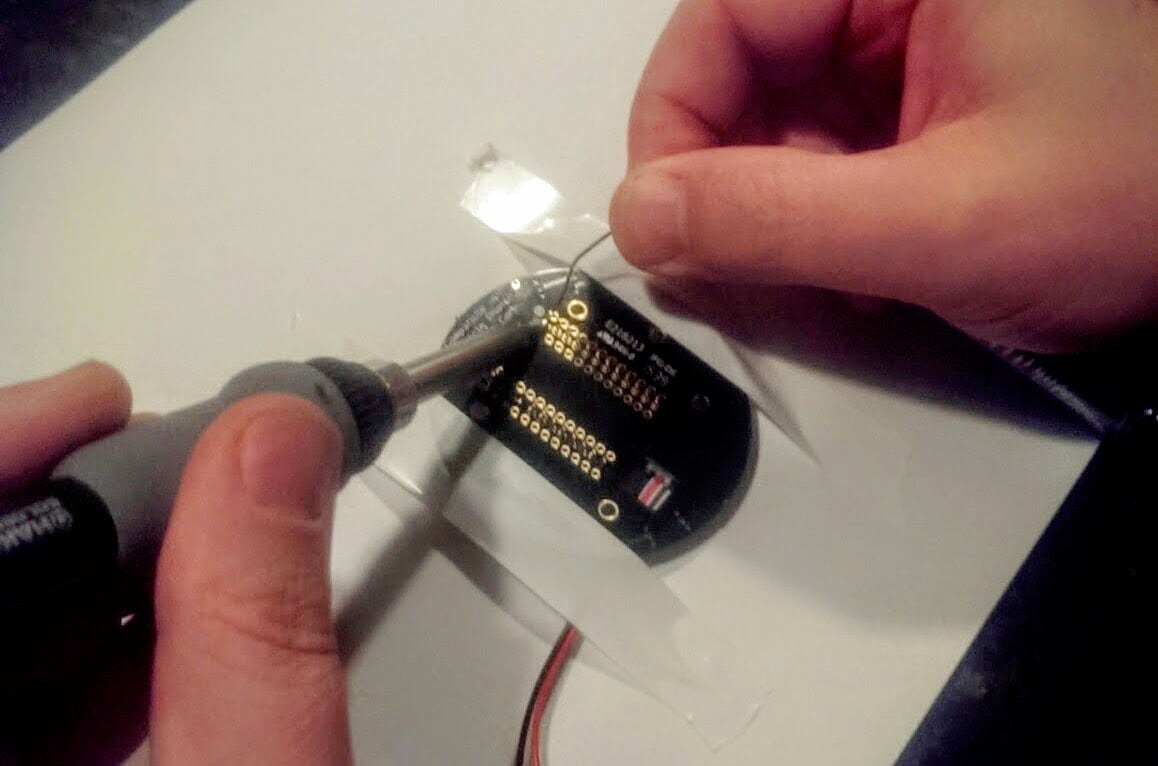
Soldering the Particle Photon to the NeoPixel ring
The NeoPixel ring that I bought is designed specifically to hold a Photon, so the pins line up nicely, and soldering them together took about 5 minutes. Notice that I used electrical tape to hold down the pieces so they wouldn’t move while soldering. (Also, in the interest of fire safety, it’s probably not a good idea to solder on top of a piece of paper, but I wanted the picture to come out more clearly.) After soldering, I used a pair of square-nosed wire cutters to clip off the unnecessary protruding ends of the pins so that they wouldn’t get in the way later.
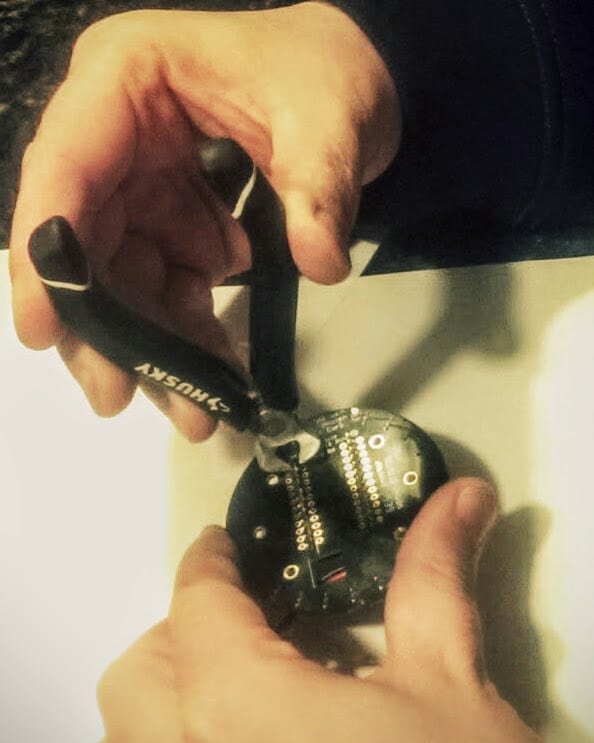
Trimming the Pins
After that was done, I plugged in the power wires that came with the NeoPixels, and screwed the other ends of the wires into the power adapter, and plugged that in. It ends up looking like this:

Particle Photon and AdaFruit NeoPixels all wired up!
This will provide power both to the Photon and to the NeoPixels. Once you’ve got power, you’ll have to follow the instructions on the Photon website to get your Photon connected to the internet.
The Photon Programming Environment
I’m deeply impressed with the folks over at Particle for how easy they’ve made this whole process. Here is a diagram of how all of the components of the system are connected:
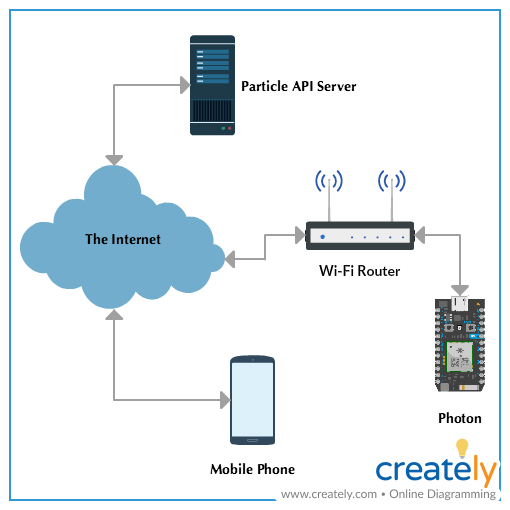
Photon Network Diagram
Once the Photon has been configured to have internet access via a Wi-Fi router (note, at this point you can NOT connect to Enterprise Wi-Fi, only to Wi-Fi that requires just a password instead of username/password), it “phones home” to the Particle API Server. The API server keeps track of all devices that are currently powered up and connected to the internet, and it relays messages to and from each Photon to whatever apps or websites are able to connect to it.
Building an app for the Photon has two parts:
- Flashing your own firmware directly to the Photon to control devices, e.g. NeoPixels or other sensors, that are connected to it. This code is written in the Arduino language using the Particle Build online coding environment.
- Writing your own mobile app or website that can communicate with the Photon via the Particle REST API. This code is written in whatever language you like to code apps or websites. In my case, I’m using the Ionic Framework.
The Particle REST API as well as firmware are extremely well documented. I have to say that getting up and running with this project really could not have been more straightforward.
Coding the Firmware
The code that goes onto a microcontroller like an Arduino (in this case, the Photon) is called firmware because, unlike software, it is “permanently” stored into the read-only memory (ROM) of a processor. Software, on the other hand, gets stored on a hard drive and is loaded into random-access memory (RAM) when it is run. Whereas the RAM gets erased every time a device is turned off, the ROM does not, hence firmware.
The process of installing firmware on a device is called flashing. When we update the firmware on a device, we say we “flash the new firmware.” This is a sensitive process, and if something goes wrong with flashing, or if it gets interrupted for some reason, your device may become unusable. Fortunately, however, the folks at Particle have made flashing new firmware onto the Photon about as painless as possible.
The folks at Particle created an online coding environment for writing and flashing firmware to their products called Particle Build. Once you’ve created an account, associated a device with your account and logged in, the interface looks something like this:
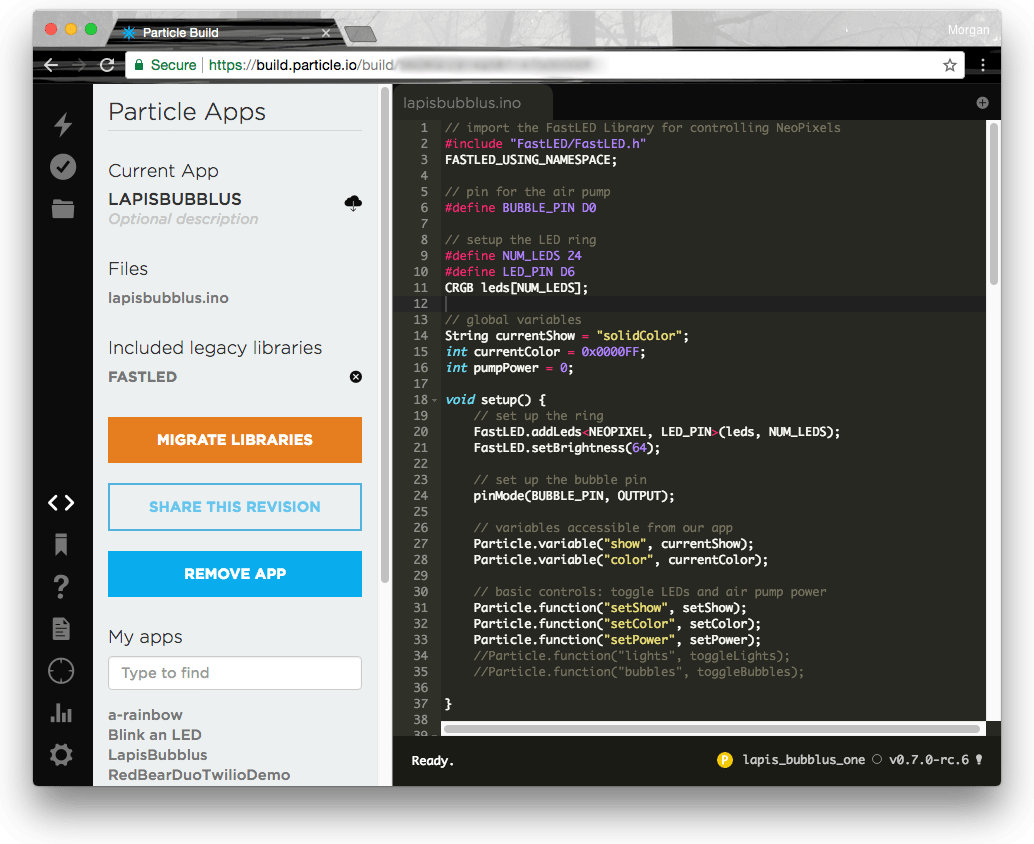
Particle Build Coding Environment
As you can see if you enlarge the picture above, everything exists within the browser. You can click the check mark in the left column to verify that your code will compile correctly, click the folder icon to save it, and when you’re ready, clicking the lightning bolt will flash your code directly to your Photon device, assuming it is powered up and connected to the internet. There are a number of popular libraries for using the Photon to do things like control a strip of LEDs already built into this environment. In this case, I’ve used the open-source FastLED library.
[cpp]// import the FastLED Library for controlling NeoPixels
#include “FastLED/FastLED.h”
FASTLED_USING_NAMESPACE;
// setup the LED ring which has 24 LEDs and
// communicates via pin D6
#define NUM_LEDS 24
#define LED_PIN D6
CRGB leds[NUM_LEDS];
// global variables
String currentShow = “solidColor”;
int currentColor = 0x0000FF; // defaults to blue
void setup() {
// set up the ring
FastLED.addLeds<NEOPIXEL, LED_PIN>(leds, NUM_LEDS);
// variables accessible from our app
Particle.variable(“show”, currentShow);
Particle.variable(“color”, currentColor);
// basic controls to set the above variables
Particle.function(“setShow”, setShow);
Particle.function(“setColor”, setColor);
}
void loop() {
if (currentShow==”solidColor”) {
solidColor();
} else if (currentShow==”rainbow”) {
rainbow();
} else if (currentShow==”strobe”) {
strobe();
} else if (currentShow==”pulse”) {
pulse();
}
}
/*
|————————————————————————–
| Basic controls
|————————————————————————–
|
| Functions for turning the LEDs and bubbles on and off.
|
*/
int setShow(String show) {
currentShow = show;
return 1;
}
int setColor(String color) {
currentColor = strtol(color, NULL, 16);
return 1;
}
/*
|————————————————————————–
| Light Shows
|————————————————————————–
|
| Each function below defines a light show.
|
*/
void solidColor() {
fill_solid(leds, NUM_LEDS, currentColor);
FastLED.show();
}
void rainbow() {
static uint8_t hue = 0;
static uint8_t delta = 3;
fill_solid(leds, NUM_LEDS, CHSV(hue, 187, 255));
FastLED.show();
hue += delta;
delay(100);
}
void strobe() {
fill_solid(leds, NUM_LEDS, currentColor);
FastLED.show();
delay(50);
fill_solid(leds, NUM_LEDS, CRGB::Black);
FastLED.show();
delay(50);
}
void pulse() {
static uint8_t brightness = 0;
fill_solid(leds, NUM_LEDS, CHSV(0, 0, cubicwave8(brightness)));
FastLED.show();
delay(20);
brightness += 1;
}
The code above is what I’ve got so far, as of today.
Writing the Mobile App
For the mobile app to control the bubbler, I used a relatively new open-source, cross-platform (i.e. iOS, Android, and web) framework called Ionic. Ionic bundles together a number of tools that many mobile app developers are already familiar with, namely:
- AngularJS
- NodeJS and NPM
- Cordova (aka PhoneGap)
- ngCordova: a library for Angular that make working with Corodova easier
- Bower, Grunt, Sass and most of the other tools
In addition, the folks working on Ionic have also included a bunch of out-of-the-box widgets like buttons and form fields, that make developing great-looking mobile apps super easy. You can find the code that I wrote on GitHub, but below are some screen shots:

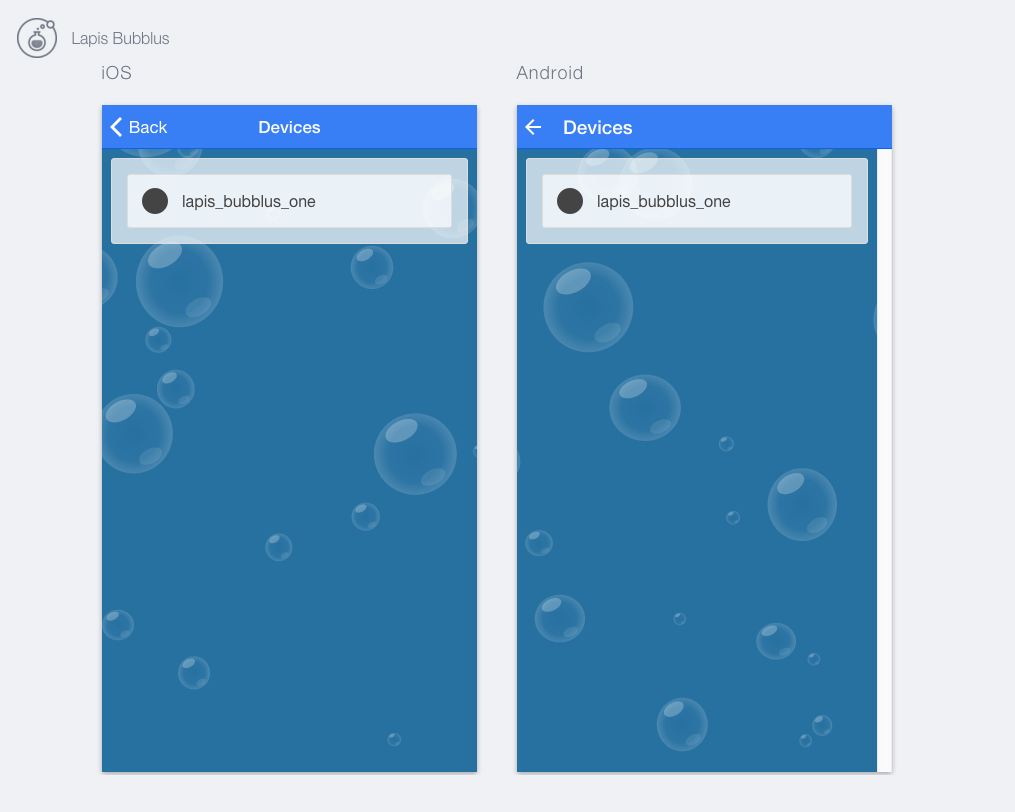
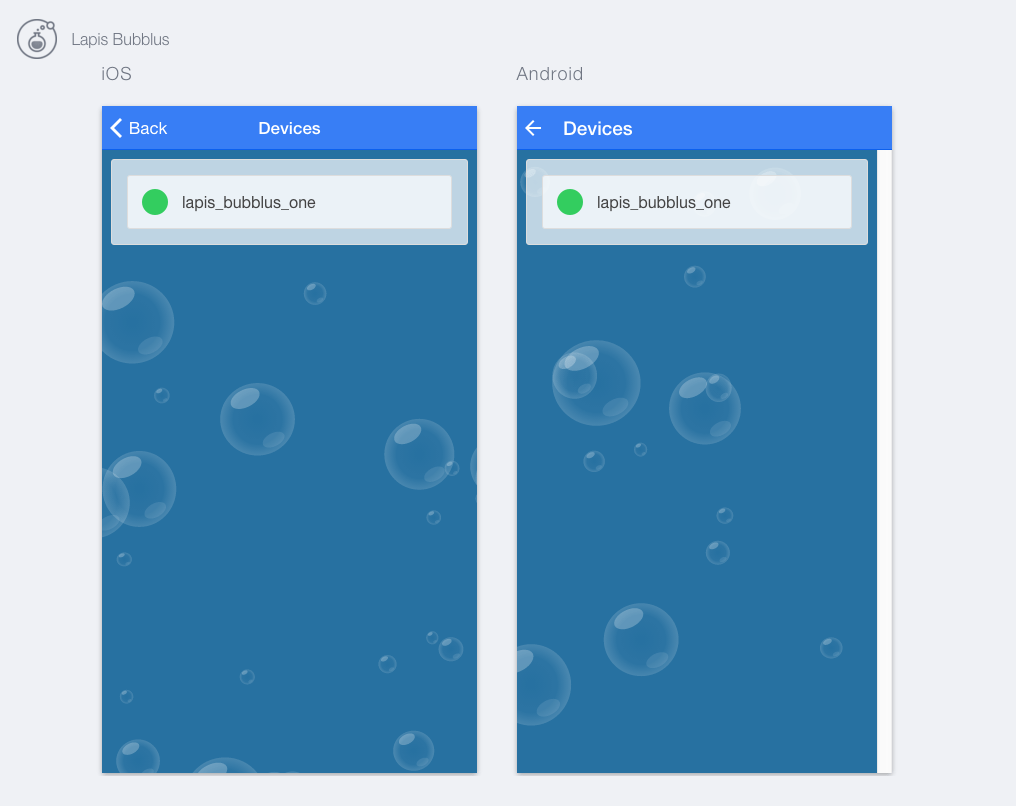

Perhaps the coolest thing about Ionic is Ionic.io. Using their command line tools, you can upload your code to their server (like PhoneGap Build) and they will build your app for you in the cloud, which means you don’t have to download or maintain either the Android SDK, or Xcode on your own system. You still have to jump through all of the various hoops to get your iOS app signed before you can test it on a real device, but it’s super easy to build for Android, download and add your new app right to your phone for testing.
Conclusion
Particle’s REST API was super simple and reliable, with amazing documentation. The Ionic framework made developing an app built upon that API a snap. All in all, I was able to get something reasonably functional and good-looking thrown together in just a couple of days. All that’s left to do is add new light shows and make the interface a bit prettier.
Is there anyway to skip this step and still have lighting? It seems very hard to me
Hi Lori,
Sure. You could just buy lights that have just an on/off setting. In my case, I wanted to be able to program them to do a number of light shows, but you could make this much simpler.