
I’m moving into a brand new office in a couple of weeks. I work at a university and mostly teach programming and web development. I was brainstorming about ways to make my office a place where I and others would really enjoy hanging out. I typically use my office almost exclusively as a place for meeting with students, so the number one group that I’d like to appeal to is 18-22 year-olds. A couple of years ago, I co-authored a paper that articulated the benefits of using participatory art to motivate people to learn science and technology stuff (in the lingo this movement is called STEM to STEAM, i.e. adding “Arts” to STEM). So my first thought was that however I decided to decorate my office, it should:
- Be based on the kind of “cool” tech stuff that I like,
- Allow visitors to participate in making it cool, and
- Be fun and cool!
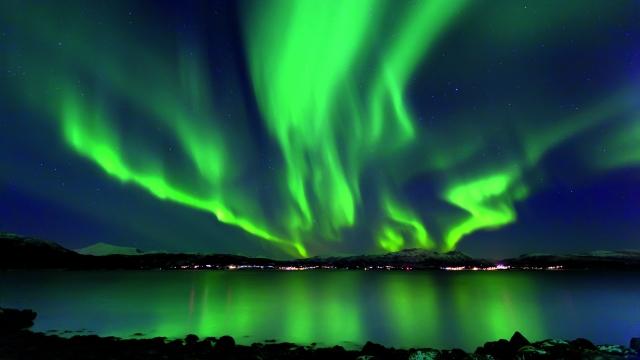
what I imagine an aurora would look like… if I ever get to see one
It all clicked a couple of months ago when I was on an Iceland Air flight to, well, Iceland, and I saw the amazing interior lights in the cabin (see the photo at the top of this post). They were clearly LEDs that pointed up to reflect off of the ceiling, and they were programmed to shimmer and flicker to create an effect like the aurora borealis. (Sadly, I’ve never actually seen an aurora in real life. It’s definitely on my bucket list. I’ll be in the Baltic later this summer, so maybe….) This was EXACTLY the kind of mood I’d like to be able to create in my office.
And if I made the LEDs programmable and connected to the web, and created a way for students (or anyone really) to program or control them, I would have the amazing, cool, fun, participatory tech experience that would make my office THE place to be in our newly renovated departmental suite. But enough of the back story, let’s dive right into the design.
The Design
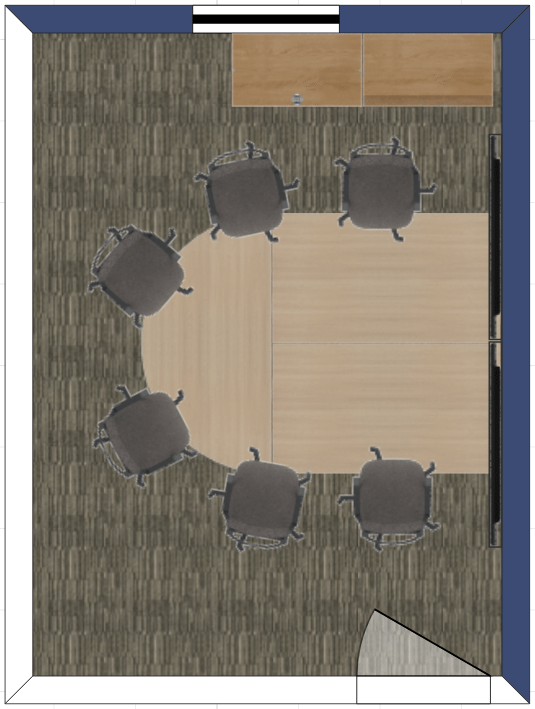
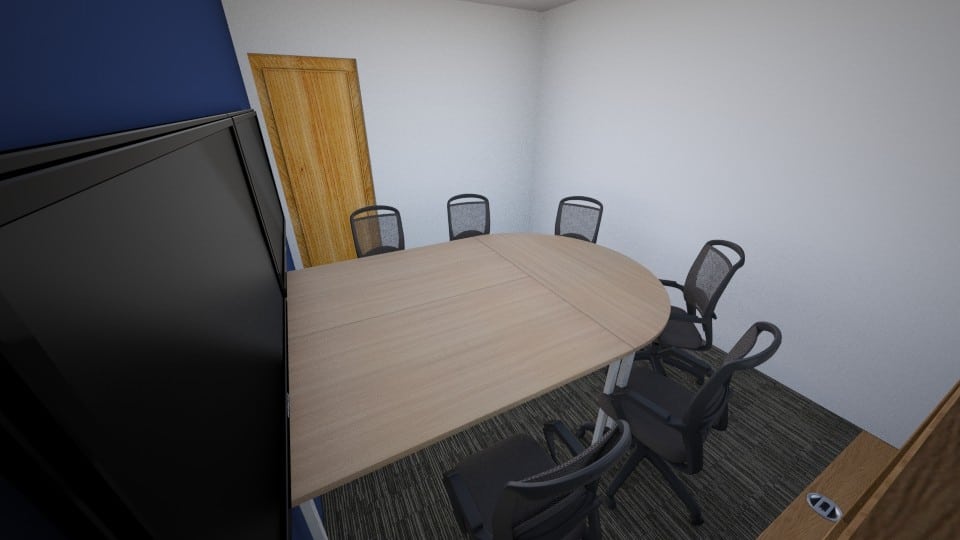
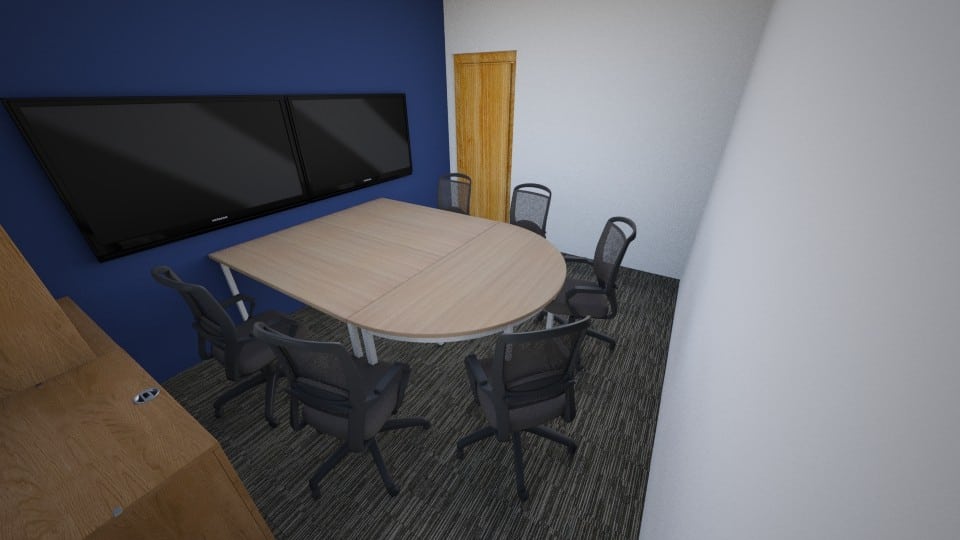
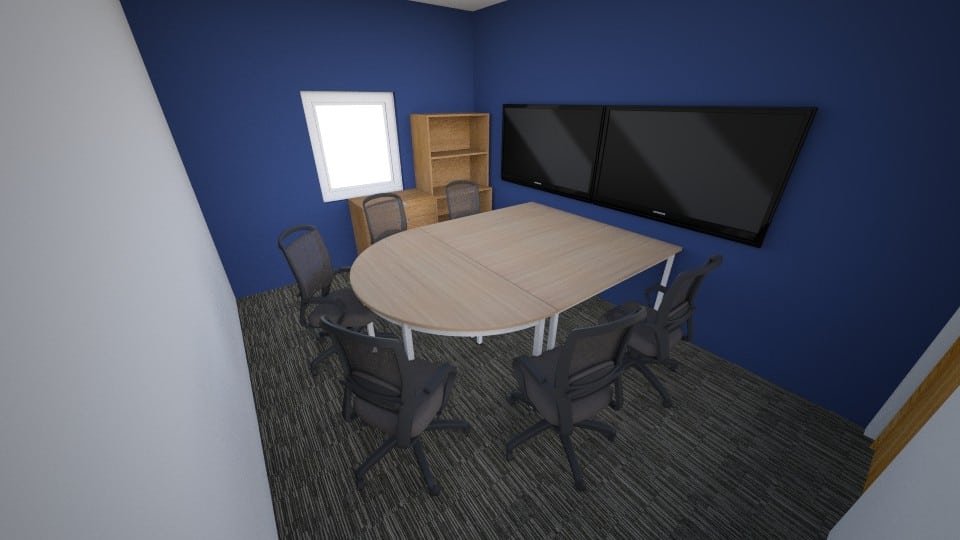
The office is pretty typical by office standards. The room will be about 10′ x 12′ (or 3m x 3.7m) and has a door and a small window in the middle of the back wall. I got some funding to get a couple of giant monitors that will go on the wall with a U-shaped table around which 5-6 people can sit and collaborate. I asked that two of the walls be painted with whiteboard paint so people can draw on them (more collaborative art!), although I’m not sure that the powers that be are going to honor that request. Here are some 3D renderings of what I envision it will look like:
I plan to put a strip of LED lights a few inches below the ceiling around the entire perimeter of the room in some sort of track that will orient them to be pointed up at the ceiling. The ceiling will just be a white tile drop ceiling, so should reflect well whatever gets projected onto it. I’d like to be able to control the light show either via a mobile app, web page, or maybe even a digital assistant like Google Home. Wouldn’t it be cool to walk into your office and just shout out, “Fire up the aurora!” and just have it bloom into lovely soothing shades of blue and purple and green? Yeah, I think so, too!
Finally, I’d like for people to be able to upload their own light show programs or maybe even sponsor a contest to see which student can design the coolest show. I can imagine adding other sensors to the room that would make it so the show could react to people and events. Anyway, that’s the basic idea. Let’s talk about challenges.
Challenge #1: Powering the LEDs
I calculated that the perimeter of the room will measure about 15 meters. At 60 LEDs/m, that comes to 900 LEDs! I’ve done some projects with LEDs before (like my Bubble Tube), but never one this big. I did try to build a 3-4 meter show for my camp at Burning Man a few years ago, but found that the lights got dimmer and dimmer the further from the power source they got. It didn’t go well.
Even though a single LED draws very little power (max 60 mA), when you get a bunch of them, it begins to add up. In my case:
15m x 60 LEDs/m x 60 mA/LED = 54,000 mA = 54A!!!
To put that in perspective, a typical cell phone charger outputs about 3A, and a typical laptop AC adapter outputs maybe 12A. In case you’re curious, almost all electrical appliances or power adapters have detailed information on them about their power inputs and outputs. Once you figure that out, it gets almost as addictive as reading food labels.
Fortunately, I found some really great resources with the details on how to power large LED installations:
- The Adafruit NeoPixel Überguide
- A Particle Community forum thread on powering LEDs
- The power topology from Phil Burgess’ 1500 LED project
- Tim’s Blog
I spent many, many hours reading over this material again and again until I understood it.
WARNING: Electricity can KILL you, or start a FIRE or make many other VERY BAD THINGS™ happen. DO NOT MESS WITH THIS STUFF UNLESS YOU ARE ABSOLUTELY SURE YOU KNOW WHAT YOU’RE DOING, AND YOU HAVE A WORKING FIRE EXTINGUISHER, AND VERY GOOD INSURANCE!!!
Okay, now that the warning is out of the way…here is a list of the components that I bought to power the system:
Alitove 5v 60A AC/DC Adapter

Alitove 5v 60A 300W Power Supply
To be totally honest, I’m not sure this is the right power supply for this job. When reading up on how to select a power supply, the recommendation is to divide the power required by your project by 80% and get a power supply that can deliver at least that much power. In my case, if all 900 LEDs were at full white brightness, they would draw 54A x 5V = 270W of power. 270W/0.8 = 337.5W, so I probably should have gone for a 350W or 400W system. That being said, I very seriously doubt that I’ll have all the lights on at full brightness often or ever. Also, this particular power supply got a lot of mixed reviews on Amazon; I clearly opted for a cheap one ($30) over name brand. On the bright side, if this one doesn’t work out, these units come in a fairly standard form factor so I should be able to swap this one out for a beefier one. (I believe MeanWell is an established brand and their 350W 5V 60A adapter is about twice as expensive at $63.)
Power Cord and Cables
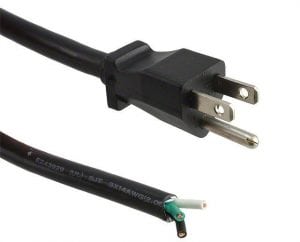
NEMA 5-15P SJT Power Cord–Male to Wires
I got really stressed out when trying to find a power cord for this power supply. I thought that since I had a 60A power supply, I needed a power cord that could handle 60A. After much googling, I figured out how moronic I was being, and also why I couldn’t find a cord with the specs I was looking for. It turns out the amp rating for a power cord is a function not just of amps, but of voltage and total power (duh!). Since my power supply is rated at 300W and will be plugged into a standard US 120V wall socket, the power cord only has to be able to handle 300W / 120V = 2.5A! So most any NEMA 5-15P (i.e. a standard 3-prong) cord would be fine. In case you’re wondering NEMA stands for the US National Electrical Manufacturers Association, and they’re the ones who determine the standards for electrical connectors. NEMA 5 refers to all 3-wire grounded devices rated for 125V maximum. The “15” in NEMA 5-15P refers to a 15A system, and the “P” stands for “plug” (as opposed to “R” which stands for “receptacle”). “SJT” stands for “service junior thermoplastic” and basically denotes a service-able portable (i.e. light, flexible, and able to stand up to wear and tear) cord that can handle 300V (junior) and has a jacket made of thermoplastic. Here’s a good page that describes the SJT standard. I got my power cord from Digi-Key for about $8, but you could just as easily get one like this from Amazon and cut off the receptacle end. (NOTE: the Digi-Key cord is 14AWG so is a bit more “heavy duty” than the 16AWG cord I linked to on Amazon.)
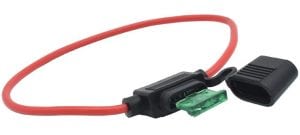
Inline Fuse Holder 12AWG Wiring Harness for 30A Blade Fuses
To add extra safety to my power distribution system, I picked up some of these 12AWG wiring harnesses with an inline fuse holder rated up to 30A. This idea came directly from Phil Burgess’ tutorial on building a 1500 LED system. These harnesses can hold smaller fuses. Since the power adapter is rated at 60A and power is divided up into 3 channels, it makes more sense to use 20A fuses (60A/3) rather than the 30A fuses. The fuses are there in case there is a power surge that might overload your system and damage either your LEDs or your microprocessor. They should also provide additional security against a fire. The Alitove power adapter has built-in fuses as well, so between the two, this should keep your system safe. Also, in case it matters to you, these harnesses use stranded wire. I typically prefer solid wire because I find it easier to solder, but since these wires are not going to be soldered, it probably doesn’t make a difference, and the stranded wire is a bit more flexible and easy to work with in tight spaces.
I used the harnesses above to connect to the positive terminals of the power adapter. To connect to the neutral terminals, I used some 12/2 Romex cable that I had lying around from a DIY kitchen renovation that I did a few years ago. I think I needed less than 4 feet total of the Romex, so I would avoid buying a whole reel if you can avoid it.
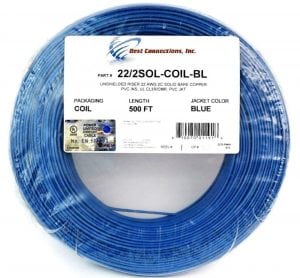
22/2 Solid Copper Security Cable
I needed a lot of much smaller cable to run the power out to the places where it will connect to the actual LED strips. Since I’m kind of an amateur when it comes to soldering, I prefer to work with solid wire rather than stranded. All of the LED projects I’ve seen use 22AWG wire to connect to the LED strips, so I needed to find a reel of 22AWG solid copper wire. It took a bit of searching, but I finally discovered that when wiring security alarm systems, it is common to use this kind of wire. So if you’re looking to buy it, you can google for “security cable.” Also, you may notice that in the caption of the image on the left here, I used the abbreviation “22/2” which means 2-conductor 22AWG cable, or a cable that has 2 wires that are each 22AWG. This is a common form of abbreviation when buying cables. For example, the power cord that I got was 14/3, or 3-conductor 14AWG cable. I got the above 500ft reel of cable for about $27 on Amazon.
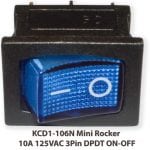
KCD1-106N Mini Rocker Switch 10A 125V 3-Pin
Finally, although this wasn’t strictly necessary, I picked up a rocker switch so I could power the whole unit on and off without having to unplug the power cable. You can probably get these at any decent hardware store, but I picked this one up off of eBay in a 5-pack for about $7. (I won’t tell you how much time I spent deciding which color of rocker switch I liked best. Hint: too much.) Technically, this is an SPST (single-pole, single-throw) switch, so any SPST that is rated at at least the same amps as your power cable should work. You may also want to pick up some female spade connectors to make it easier to attach your cables. They should only cost a couple of bucks at your hardware store.
Conclusion to Part 1
Okay, so I haven’t actually built anything yet, but in case you’re keeping track, I’ve already spent about $85 just on cables and an AC adapter. I should stress that I spent many hours (30? 40? more?) reading and researching about what components I needed and where to get them. You should absolutely follow all of the links I provided here and read those article carefully before you embark on your own project like this. I’d also recommend doing some smaller projects first before jumping into a many-pixel project like this. I’ve tried to answer some questions here that were not obvious to me and which I had to search quite a bit for which to find answers. I hope it helps!
In Part 2 of this series, I’ll talk about the enclosure I built to house the power distribution system.
Webmentions
[…] coding environment called The Aurora Project where my students can log in and write code to control LED light shows that will play in my office. The code itself will be stored on GitHub. I set up Auth0 to use GitHub as the 3rd party identity […]
[…] Part 1 of this series, I introduced this project: I’m building a light show for my office in order to attract […]